
Using Java in the terminal can be tricky when you’re dealing with multiple projects with different Java versions. Projects like fnm make this easy. This is dumbed-down version of these type of software.
👉 Checkout the gist here.
👉 Checkout the dev.to article here.
Installation
Terminal
Save the following script inside your $HOME directory as .jenv
#!/bin/sh

java_dir="/Library/Java/JavaVirtualMachines"
java8_dir="$java_dir/adoptopenjdk8"
java11_dir="$java_dir/adoptopenjdk11"

export JAVA_HOME="$java8_dir/Contents/Home"

function _download_java8() {
    if [[ ! -d "$java8_dir" ]]; then
        temp_dir=$(mktemp -d)

        echo "⏲  downloading java 8"

        curl -L \
            "https://github.com/AdoptOpenJDK/openjdk8-binaries/releases/download/jdk8u252-b09.2_openj9-0.20.0/OpenJDK8U-jdk_x64_mac_openj9_8u252b09_openj9-0.20.0.tar.gz" \
            -o "$temp_dir/java8.tgz" > /dev/null 2>&1

        echo "📤  extracting"

        tar xvzf "$temp_dir/java8.tgz" -C "$temp_dir" > /dev/null 2>&1

        echo "👀  password for moving to safe directory"

        sudo mv "$temp_dir/jdk8u252-b09" "$java8_dir"

        echo "✅  completed"
    fi

    export JAVA_HOME="$java8_dir/Contents/Home"
}

function _download_java11() {
    if [[ ! -d "$java11_dir" ]]; then
        temp_dir=$(mktemp -d)

        echo "⏲  downloading java 11"

        curl -L \
            "https://github.com/AdoptOpenJDK/openjdk11-binaries/releases/download/jdk-11.0.7%2B10.2_openj9-0.20.0/OpenJDK11U-jdk_x64_mac_openj9_11.0.7_10_openj9-0.20.0.tar.gz" \
            -o "$temp_dir/java11.tgz" > /dev/null 2>&1

        echo "📤  extracting"

        tar xvzf "$temp_dir/java11.tgz" -C "$temp_dir" > /dev/null 2>&1

        echo "👀  password for moving to safe directory"

        sudo mv "$temp_dir/jdk-11.0.7+10" "$java11_dir"

        echo "✅  completed"
    fi

    export JAVA_HOME="$java11_dir/Contents/Home"
}

function jenv() {
    select version in java8 java11 exit;
    do
        case $version in
            java8)
                _download_java8
                echo "🚀  java8 set!"
                java -version
                break
                ;;
            java11)
                _download_java11
                echo "🚀  java11 set!"
                java --version
                break
                ;;
            exit)
                echo "👋  exiting"
                break
                ;;
            *)
                echo "🚫  unknown selection"
                ;;
        esac
    done
}
Then add source "$HOME/.jenv to your .bashrc or .zshrc.
Reload your terminal or run source .bashrc or source .zshrc to ensure the script loads.
At this point, you should be able to run jenv in terminal to select Java 8 or Java 11.
IntelliJ
If you use IntelliJ, then these instructions will help guide you to an easier approach in switching JDKs.
Navigate to Project Structure using either <kbd>Cmd</kbd> + <kbd>;</kbd> or going to File -> Project Structure…
Navigate to SDKs under Platform Settings and click the + button to add the newly created JDKs.
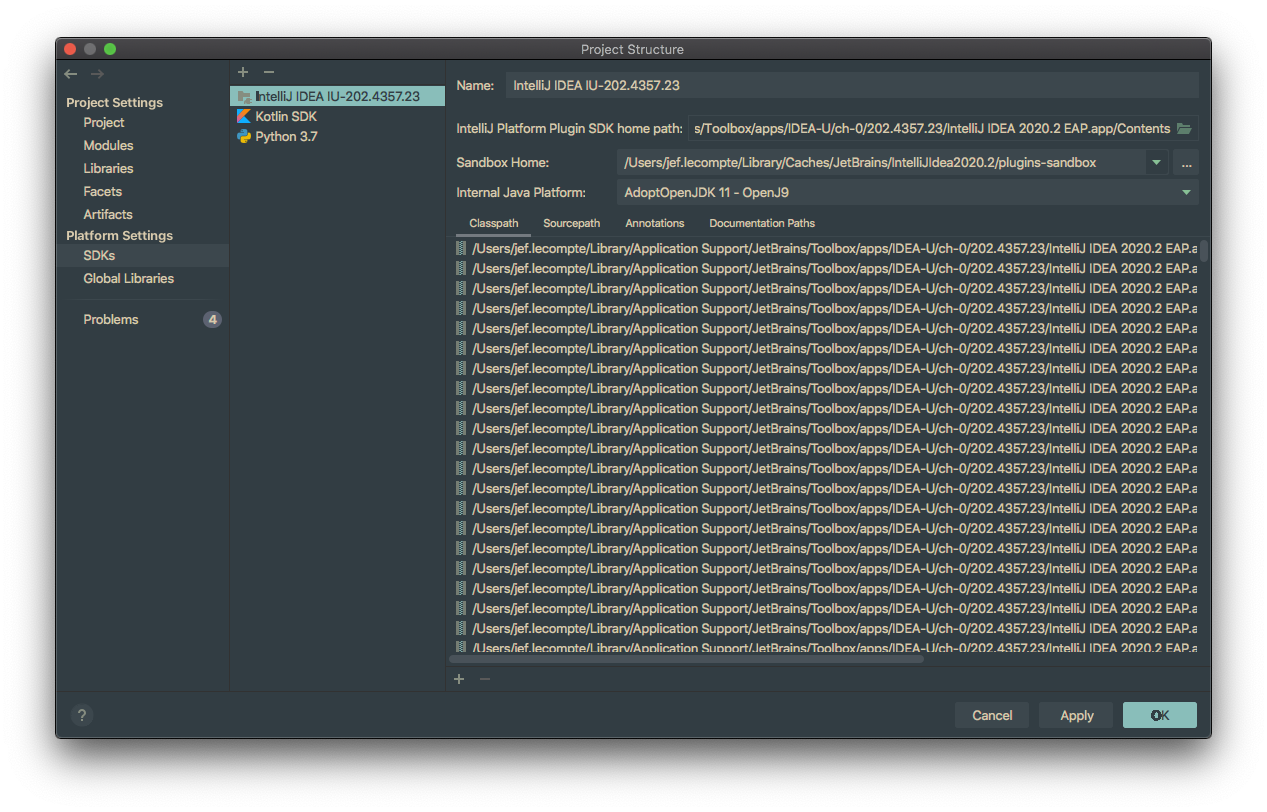
Either you’ll find auto populated JDKs or you will need to add them manually by clicking Add JDK… and locating them in /Library/Java/JavaVirtualMachines/adoptopenjdk{8,11}/.

Giving them nice names help.

Navigate to Project under Project Settings and choose the recently added SDK that’s relevant to your projects target JDK.

Make sure your Project language level is set to SDK default.

Now you’re all set within IntelliJ! 🚀
Caveats
Sometimes the Gradle wrapper can have some difficulties picking up the new SDK. You can alleviate this pain point by going to Preferences via <kbd>Cmd</kbd> + <kbd>,</kbd> or IntelliJ -> Preferences and navigating to Gradle under Build, Execution, Development -> Build Tools.
Set the Gradle JVM under Gradle to Project SDK

Voila! 🔮 You’re definitely ready to go now!