tuimoji
tuimoji is a terminal based emoji chooser for *nix. With tuimoji you can search and browse emojis and copy them to your clipboard without ever leaving the comfort of your terminal!
Features
- Browse emojis by category.
- Search emojis by name.
- Supports skin tone modifiers.
Installation
tuimoji requires Python3 and xclip to be installed. xclip can be installed via your favorite package manager (if it is not already).
To install tuimoji, use pip:
pip3 install --user tuimoji
Arch Linux
tuimoji is available in the AUR
and can be installed via makepkg
or with your favorite AUR helper:
yay -S tuimoji
Usage
Launch tuimoji with the tuimoji
command. By default, the search input is
focused, allowing you to type to search immediately:
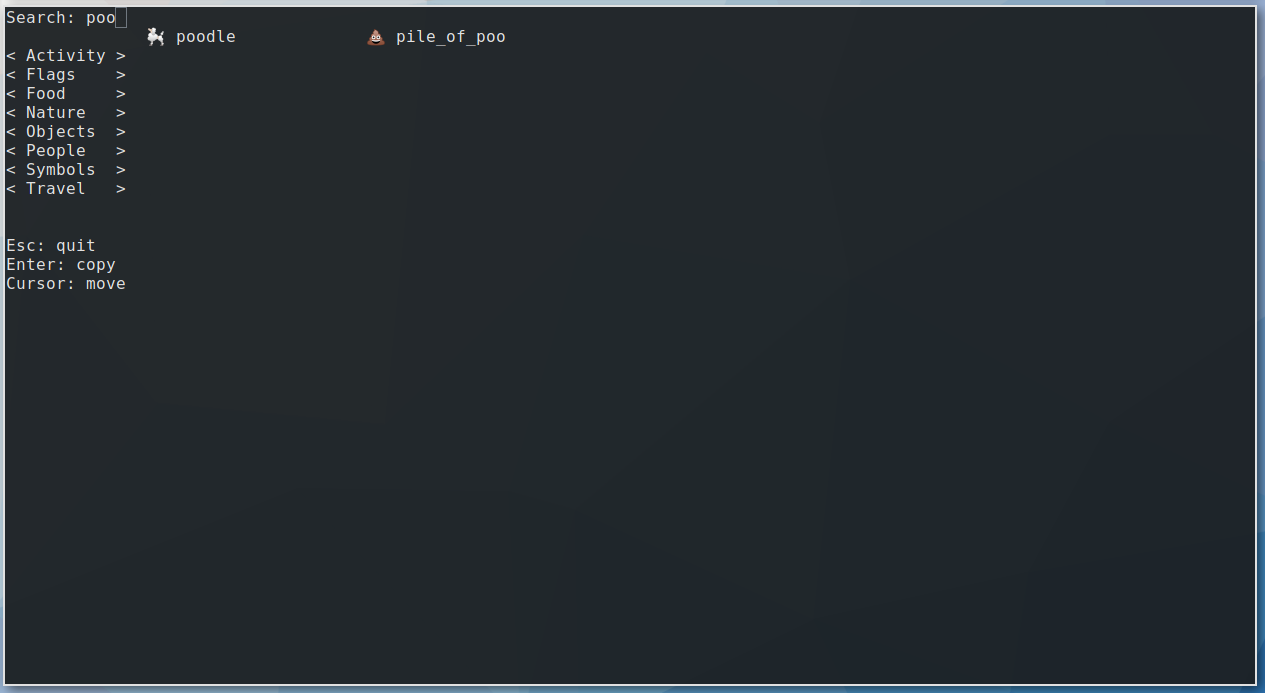
Press Enter to highlight the first result, and use the cursor keys to navigate to the desired emoji. Pressing Enter again will copy the emoji to your clipboard and exit the program.
Alternatively you may browse emojis using the named categories. Use the cursor keys to navigate and press Enter to select a category.
Skin tone modifier
tuimoji defaults to 0
which is the original Simpsons skin tone (no modifier).
To change the tone launch tuimoji with the -t
or --tone
command line argument:
tuimoji -t 6
The available skin tone modifiers are:
Tone | Result |
---|---|
0 | 👊 |
1_2 | 👊🏻 |
3 | 👊🏼 |
4 | 👊🏽 |
5 | 👊🏾 |
6 | 👊🏿 |
Change the clipboard
By default tuimoji will copy characters to the clipboard, which is the usual selection when using copy and paste operations (ctrl+c/ctrl+v). You can also tell tuimoji to place the character on the primary (middle click paste) or secondary (unused?) selections.
Launch tuimoji with the -s
or --selection
command line argument:
tuimoji -s primary
Acknowledgements
Thanks to shanraisshan/EmojiCodeSheet for the contents of the .json data file in this project.
Share this recording
Link
Append ?t=30
to start the playback at 30s, ?t=3:20
to start the playback at 3m 20s.
Embed image link
Use snippets below to display a screenshot linking to this recording.
Useful in places where scripts are not allowed (e.g. in a project's README file).
HTML:
Markdown:
Embed the player
If you're embedding on your own page or on a site which permits script tags, you can use the full player widget:
Paste the above script tag where you want the player to be displayed on your page.
See embedding docs for additional options.
Download this recording
You can download this recording in asciicast v2 format, as a .cast file.
DownloadReplay in terminal
You can replay the downloaded recording in your terminal using the
asciinema play
command:
asciinema play 200302.cast
If you don't have asciinema CLI installed then see installation instructions.
Use with stand-alone player on your website
Download asciinema player from
the releases page
(you only need .js
and .css
file), then use it like this:
<!DOCTYPE html>
<html>
<head>
<link rel="stylesheet" type="text/css" href="asciinema-player.css" />
</head>
<body>
<div id="player"></div>
<script src="asciinema-player.min.js"></script>
<script>
AsciinemaPlayer.create(
'/assets/200302.cast',
document.getElementById('player'),
{ cols: 81, rows: 24 }
);
</script>
</body>
</html>
See asciinema player quick-start guide for full usage instructions.
Generate GIF from this recording
While this site doesn't provide GIF conversion at the moment, you can still do it yourself with the help of asciinema GIF generator utility - agg.
Once you have it installed, generate a GIF with the following command:
agg https://asciinema.org/a/200302 demo.gif
Or, if you already downloaded the recording file:
agg demo.cast demo.gif
Check agg --help
for all available options. You can change font
family and size, select color theme, adjust speed and more.
See agg manual for full usage instructions.